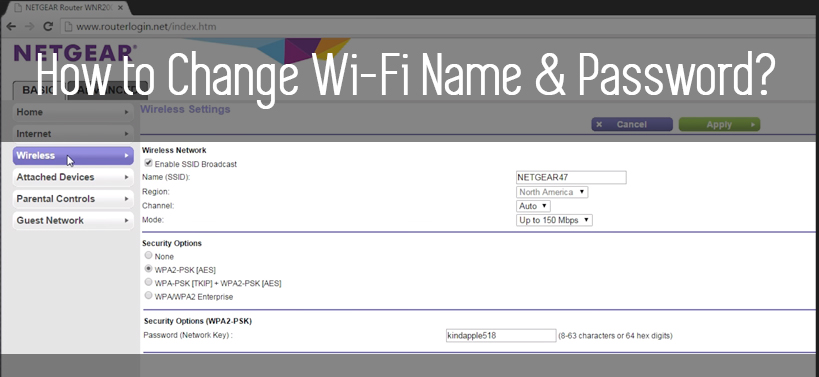
Changing the Credentials of the Wireless Network

As there are plenty of wireless networks around us, therefore you will have to change the name of your network to make it identifiable. Also, since almost all the routers come with the default password, thus it is quite necessary to alter that password due to security reasons. Here, you will get general procedures on how to change your wifi name.
How to change the WiFi name and Password?
You will get various ways to alter the name of the wireless network and password here.
1: Procedure to find router address on Mac
In here, you get steps regarding the process of finding the address of the router on Mac. For that to happen, follow the steps below.
- First, go to the top left corner of the screen and click on the ‘Apple’ logo. This action will open the drop-down menu.
- Now, from that menu, locate and choose the ‘System Preferences… ‘ option. As soon as you click on that option, then a new window having the name ‘System Preferences’ will come up.
- Inside that window, locate and choose the ‘Network’ option. This opens a new window having the name ‘Network’.
- Within that window, go to the bottom right corner and then choose the ‘Advanced…’ button. At this time, a pop-up window will come up, in it, choose the ‘TCP/IP’ tab.
- Under this tab, go to the ‘Router’ field and then take note of the address number.
2: Get the address of the router via Windows Machine
You will steps here regarding how to find the address of the router within the Windows computer. In order to do that, follow the steps below.
- First, tap on the ‘Windows’ logo to open the ‘Start menu’
- Inside the menu go to the left pane and then click on the ‘Gear’ icon above the ‘Power’ icon to open the ‘Settings’ window.
- Now, within that window, locate and choose the ‘Network & Internet’ category. After that, a new page will come up, in it, go to the left pane and choose the ‘Status’ option.
- As soon as you click on that option, then go to the right pane and select the ‘View your network properties’ link. This action will open a list full of different types of networks.
- From that list, locate the heading ‘Wi-Fi’ and then take note of the number present within the ‘Default gateway’ field.
3: Alter the name of the wireless network for both Windows and Mac
Here, you will get the process of how to change WiFi name on Mac. To do that, follow the steps below.
- First, open a web browser of your preference.
- Next, input the address that you have copied into the URL bar of the browser and then press the ‘Enter’ key. This action will launch the configuration process of the router.
- Once the router configuration page opens up, next, you will have to input the default username and password of the device and login to that page. Usually, these credentials are present below the router.
- Now, click on the ‘Settings’ option, and then choose the general section. Inside that section, locate for the ‘Wireless Settings’ subsection.
- Within that subsection find the SSID field of the router. There can be another name for this field such as ‘Wireless Network Name’ or something like it.
- Now, within that field, write a name that you want for the wireless network.
- Finally, click on the ‘Save’ or ‘Apply’ button to set the new wireless network name.
4: Alter the password of the Wireless Network
There will be steps here to change the password of the wireless network.
- First, to open the router settings page, go to the third method and then follow the three initial steps
- Once the router configuration page is opened, next, navigate to the ‘Settings’ page. Inside that page, locate and click on the ‘Security’ tab.
- Under that tab, set the security mode to ‘WPA 2’.
- After that, within the ‘Password’ field input the strong password and apply the change
- At last, reboot the router and then enter the newly set wireless password to connect to the internet.

 Stars-923: Unveiling the Mystical Cosmos
  Buying Guide for Short-Throw 4K Projectors for Gaming
  5 Best Wireless Apple CarPlay Adapters in 2024
  The Essential Role of Animated Explainer Videos in Tech Documentation
  How Do You Apply Agile Testing Principles And Practices Across Different Domains And Contexts?
  What Are The Benefits And Challenges Of Using Mock Objects In TDD?