How to Cast Android Screen to PC: View Phone Screen on PC via USB

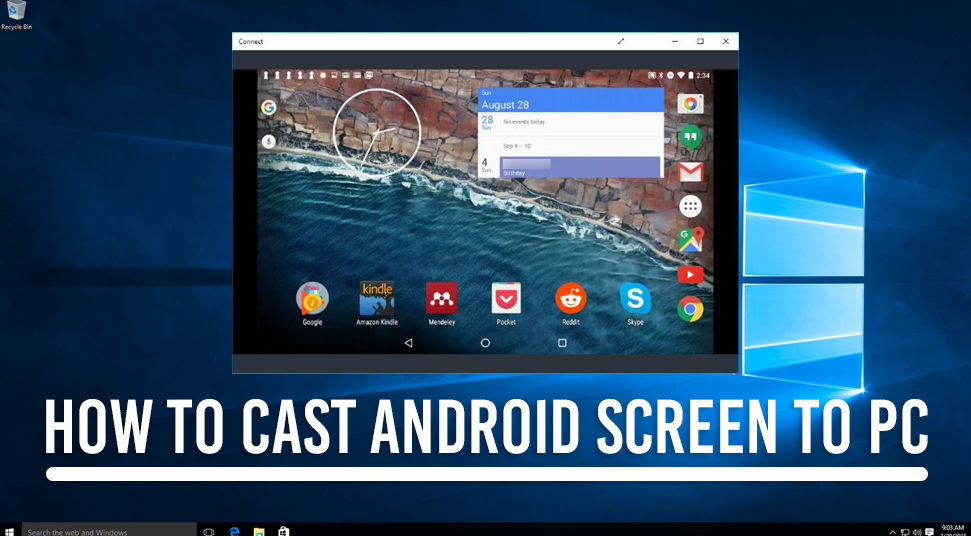
If you want to watch whatever you are watching on your phone to the computer screen, then casting/mirroring is the process to opt for. Here, the article will provide you with options on how to cast Android screen to PC.
About Screen Mirroring Process
The screen mirroring or casting is the process with the help of which you can cast or mirror the screen of one device to another device via both wired and wireless connections. In other words, mirroring a screen is simply a process to replicate a device’s screen to a different device.
Requirements to meet to Mirror a Screen
In order to mirror a screen of your Android phone, you need to fulfill the following requirements. For that to happen, follow the methods below.
1. Enable ‘Developer Options’ on the Android Device
Here, you will get steps to enable the ‘Developer Options’ on your Android Device.
- First, unlock the Android device and then swipe down from the upper section of the screen. This action will reveal the ‘Notifications’ area.
- In that area, go to the top-right corner and tap on the ‘Gear’ icon to open the ‘Settings’ application.
- Inside that application, locate the ‘About Phone’ option and then click on it. You can get this option, within the ‘System’ category on some devices.
- Now, on the ‘About Phone’ screen find the ‘Build Number’ item and tap it five times to reveal the ‘Developer options’ on the ‘System’ category.
- Once you get the ‘Developer options’, next, click on the same to see all the options available for the developers.
2. Activate USB Debugging on Developer Options
You will get the steps on how to enable the ‘USB Debugging’ from the ‘Developer Options’. So, follow along.
- First, on your Android phone, swipe left or right to find the ‘Settings’ application and click on the same.
- As soon as the ‘Settings’ application opens, next, go to the ‘System’ category and select it. After that, from the list of items present in it, tap on the ‘Developer options’.
- Now, a new page within the ‘Settings’ application will appear, in it, go to the ‘Debugging’ section.
- Under that section, locate the ‘USB Debugging’ option and turn it on. If you get a ‘Allow USB debugging’ message box, then put a tick mark on the option ‘Always allow from this computer’
- At last, click on the ‘OK’ button.
How to cast Mobile Screen on Laptop?
You will get information about multiple applications that can help you on how to cast Android screen to pc.
ApowerMirror
ApowerMirror is an application that allows you to cast your Android device to the computer and the other way round. You can control the Android device with the mouse and keyboard of the computer, even the PC can be controlled by the Android phone.
This application also provides you with the capability to write and draw something on the phone’s screen and display it on the other. It also allows you to cast three Android devices simultaneously. There are many more features available with the ApowerMirror software.
1. Mirror Android Screen to a computer via USB Cable
Get steps here to cast a screen of the Android phone to a computer via USB cable with ApowerMirror.
- First, get the ApowerMirror application on both your computer and the Android phone from the official website of ApowerMirror. After that, install the application within those devices.
- Now, on the Android device enable the ‘USB Debugging’ from the ‘Developer options’. Next, connect the Android device with the computer via a USB cable.
- Launch the ApowerMirror application on the PC, and click on the ‘START NOW’ to get its screen and display the same on the computer.
2. With ApowerMirror cast the Android screen Wirelessly
To cast the Android screen wirelessly to a PC with the ApowerMirror, follow these steps below. When you use the wireless connection to cast a phone screen to a computer, make sure that both the devices are not the same network.
- If a USB cable is connected between the phone and computer, then remove it from those devices.
- After that, execute the ApowerMirror application on the phone. When the application opens up, next, go to the bottom of the screen and tap the button with ‘M’ icon.
- As you click on that icon, then a list of all the wireless devices will show up. Now, from that list, locate and choose your PC.
- Next, select the option ‘Phone Screen Mirroring’.
- Finally, choose the ‘Start Now’ button to cast the device display to the computer.
Vysor
The Vysor is another application that you can use to mirror or cast the Android screen to the computer. This app is very easy to setup. With this app, you can utilize the applications resides on your phone with the keyboard and mouse of the computer.
One of the major disadvantages of the Vysor application is that most of the features are available with the ‘Pro’ version. But, since the performance of this application is very fast, therefore some people prefer it to the other softwares.
1. Cast the Android display to the computer for Vysor Application with USB
You will get steps here to cast the screen of an Android device to the computer with a USB cable for the Vysor application.
- First, download the Vysor application on both the Android and computer devices, then install it.
- Once the installation processes are over, next, connect the Android device to the computer with the USB cable.
- Next, on the computer open the Vysor application and allow it to show the following message ‘Vysor has detected a device’.
- At last, press the ‘view’ button on the application to see the Android device’s screen on the computer.
AirDroid
AirDroid is an application that allows you to control and manage your Android device from a PC, that too without any wires. This web application can cast all the notifications, messages and even allow you to receive and reject calls that the phone gets, etc. There is a dedicated application for the Android phone, and also for the computer. Even if the AirDroid application has many features, but the biggest drawback is that it does not allow you to run any type of apps within the phone.
1. Wirelessly cast the Android screen to PC via AirDroid
Follow these steps below to mirror the Android screen to a computer using the AirDroid web application.
- First, on the Android device download and install the AirDroid application from the Google PlayStore.
- Next, open a web browser on the computer and visit the web application of the AirDroid.
- Now, create an account either via the phone or the web application on the computer.
- After that, sign in to the account via the phone and add the computer with which you want to connect it.
- Once the account sign-in process is over successfully, next, access the contents of the phone with the help of the icons present on the web application.
Screen Stream Mirroring
The Screen Stream Mirroring is an application that is used to broadcast and cast the Android phone display, along with the audio. You can utilize this application to stream your phone’s display on devices like computers, TV’s and any streaming websites.
Even though you can cast the screen of your phone with this application, but cannot control the Android device. There is a free and full version of this application.
1. Cast Android screen on a browser with Screen Stream Mirroring
You will get steps here to cast the screen of your Android device with the Screen Stream Mirroring application.
- First, launch this application and then from the Android phone stream a video.
- Next, go to the bottom of the screen and follow the address, present there.
- After that, enter that exact address on the URL bar of the browser within the computer.
- At last, the stream will begin and you can watch the video on the computer browser.
2. Use the Screen Stream Mirroring to mirror Android display Wirelessly
Here, get steps on how to mirror the Android display wirelessly via Screen Stream Mirroring application.
- First, go to the Google Play Store on your Android phone and install the Screen Stream Mirroring application.
- Once you get a popup window on your smartphone from this application, next, click on the ‘Allow’ button.
- Now, move to the computer and then launch the ‘VLC’ player. Within that player, locate ‘File’ on the menu bar and then click on the same. This action will launch a drop-down menu.
- From that menu, click on the ‘Open Network Stream’ option. Next, you will get an address on a new dialog box.
- Copy that URL in the section provided on the Android application. This will connect both the devices i.e computer and the phone wirelessly.
- Finally, click on the ‘Play’ button.
Mobizen
The Mobizen application is also another software that allows you to display the Android screen on to the computer. This application is quite similar to the Vysor software, however, you can use it for free to cast the Android screen and control the phone also.
On the paid version of the Mobizen application, you can add the push notifications and set up the screen transparency. There are so many good features available with this application, but, one of the biggest flaws with it is that in the wireless mode you cannot control the phone.
1. Cast the Android screen using USB for Mobizen
In order to mirror the Android screen with the help of USB cable using the Mobizen application, follow the steps below.
- First, from the Microsoft Store and Google Play Store, locate the Mobizen application then download and install the same into the respective devices.
- Now, on the Android device activate the ‘USB Debugging’ feature from the ‘Developer Options’
- After that, locate the ‘Mobizen’ application and tap on the icon to launch the same. Once the application opens up, next, login to it.
- Now, go to the computer and launch the ‘Mobizen’ software. Then, select the connection methods i.e either wireless or USB and log in.
- Finally, to connect and mirror the Android screen on the computer, click on the ‘Start now’ button from the popup window that appears.
Scrcpy
The Scrcpy is the is a free application to mirror the Android screen to the computer. However, the main thing is that you do not need to install this software, but only a tool ADB or Android Debug Bridge.
This software is able to cast the Android screen to the computer over both connections wireless and USB. The main feature of the Scrcpy application is that it is lightweight and therefore the startup time takes very little time. The video quality that this application can provide you is 1080p or above which is great.
One of the biggest disadvantages of the Scrcpy application is its setup process, for which you will need to have technical knowledge about the ‘Command-Line’ and the ADB tools etc.
1. Steps to get the Scrcpy on the Windows and execute on Android
You will get the steps to get the Scrcpy application on the Windows computer and then run it on the Android phone.
- First, open the browser on the Windows machine and then visit the official Github website.
- Within that website go to the search section then type the “Scrcpy” and hit the ‘Enter’ key.
- Next, from the results page that appears, under the ‘Repositories’ section choose the first option. Now, scroll down the page until you get to the section ‘Get the app’.
- Once you are in the above-mentioned section, next, navigate to a subsection ‘Windows’ and download the prebuilt archives according to your system architecture.
- After the download process is over, then open the zipped file. Next, press the ‘Windows + R’ keys together and open the ‘Run’ dialog box.
- On that dialog box, type “cmd” on the empty space and then choose the ‘OK’ button. This will open a new ‘Command Prompt’ window.
- After that, insert the Android device and then type in the following command “scrcpy”
2. How to connect an Android device wirelessly to PC via Scrcpy?
Steps to connect the Android device wirelessly to the computer via Scrcpy. As the Scrcpy application has ADB tools, therefore it can connect wirelessly between the Android device and the computer.
- First, be sure that the computer and the Android device connected to the same wireless network.
- Now, go to the ‘Settings’ application on the Android device and then find the IP address of it. To get the IP address follow the options – “Settings -> About phone -> Status”.
- After that, go to the ‘Command Prompt’ application and type the following command “adb tcpip 5555” and ‘Enter’ key. This action will activate the ADB over TCP/IP on the phone.
- Now, if the smartphone is connected to the computer via USB, then unplug it first. Next, type in the command “adb connect (IP address of the phone):5555” and hit the ‘Enter’ key.
- Once the wireless connection is established, next, on the ‘Command Prompt’ enter the following “scrcpy” command to cast the screen of Android on the computer.
How to cast Android screen to Windows 7?
You can cast the Android screen to Windows 7 using a ‘Miracast’ feature. This feature is a technology that lets you mirror any devices screen on to the displays of computers, televisions, etc.
The Miracast feature is available by default with the latest versions of Windows like 8.1/ 10. However, this feature was not available with the Windows 7 OS, but, you can still use Miracast technology provided if your computer supports wireless display.
1. Inspect the support for Miracast via DirectX Diagnostic Tool
To check Miracast technology support via the DirectX Diagnostic Tool follow these steps below.
- First, to launch the ‘Run’ dialog box tap on both the keys ‘Windows + R’ simultaneously.
- As soon as the ‘Run’ dialog box opens up, then on the blank area type the text “dxdiag” beside the ‘Open:’ label. After that, click on the ‘OK’ button.
- This action will launch the new window having the name ‘DirectX Diagnostic Tool’ will come up. On that window, go to the bottom and then click on the ‘Save All Information’ button.
- Once the information is saved as a text file, next, open that file and look for the ‘Miracast’ field.
- Next, check the information within that field. If it says ‘Available’, then everything is fine, otherwise, you cannot cast the Android screen to the Windows 7 PC.
2. Miracast technology setup using Intel WiDi
To mirror the Android screen to Windows 7 and vice versa, you need to set up the Miracast technology via the Intel WiDi. In order to do it, follow the below.
- First, search for the Intel WiDi application from the official Intel website and then download the setup file.
- Once the download is over, next, double-click on the setup file, and follow the on-screen information to install the Intel WiDi application.
- After the installation of Intel WiDi software is complete, double-click on the application to execute the same.
- Next, go to the phone and open the ‘Settings’ application from the notifications area by swiping down from the top of the screen.
- Then, under the ‘Wireless & Networks’ section choose the ‘More’ option. After that, locate and tap on the ‘Wireless display’ option. For this turn on the WiFi within the phone and check if it is connected to the same network as the computer.
- Now, go to the computer and see if you can see the Android phone or not. Once you can see the device, next, click on the same to make a connection.
- Finally, once the connection between the two devices is over, next, see if you can cast the Android screen to the Windows 7 computer or not.

 Stars-923: Unveiling the Mystical Cosmos
  Buying Guide for Short-Throw 4K Projectors for Gaming
  5 Best Wireless Apple CarPlay Adapters in 2024
  The Essential Role of Animated Explainer Videos in Tech Documentation
  How Do You Apply Agile Testing Principles And Practices Across Different Domains And Contexts?
  What Are The Benefits And Challenges Of Using Mock Objects In TDD?