Resolve Clownfish Voice Changer Not Working Problem Easily

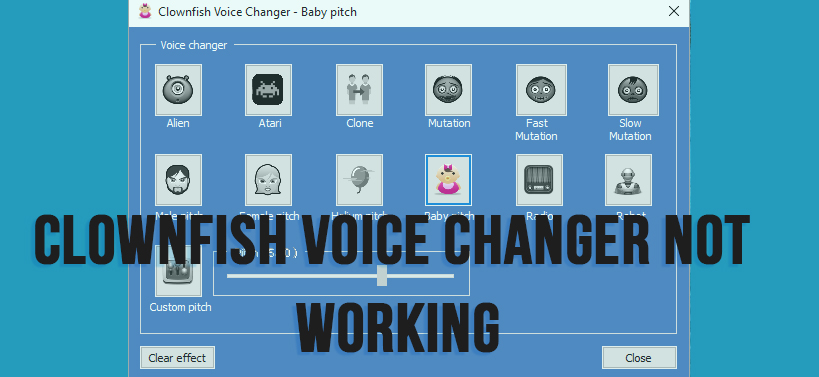
Clownfish is a voice translation software, that is used with various communication applications like Discord, Skype and etc. This software has plenty of features. Some of those features are like real-time voice translation in different languages and support to alter the pitch of voice.
Despite the fact that this voice changer application has some good features even then, you can get the Clownfish voice changer not working issue.
There are many reasons as to why this problem can occur after all. Some of those reasons are that if the Skype version is not compatible, then this error can appear. Even, if the microphone is not synchronized correctly, then there is a chance for you to encounter this issue.
Further, if the Clownfish version is not up to date, then you may get this problem also. Moreover, if the voice changer application is not installed correctly, then you even get this Clownfish Voice Changer Not Working error glitch.
How to fix Clownfish Voice Changer Problem?
Here, there will be a multitude of methods that will allow you to rectify this error as soon as possible.
One: Update the Latest Version of Clownfish
If the Clownfish application is not up to date, then there is a chance for you to encounter this problem. The best answer to resolve this issue is to update the Clownfish application to its current version. For that to happen, follow the steps below.
- First, press both the ‘Windows + I’ keys to open a new window having the title ‘Settings’.
- Inside that window, locate and choose the ‘Apps’ category. As soon as you click on that category, then a new page appears, in it, go to the section ‘Apps & features’ section.
- Under this section, there will be a list full of all the applications installed within the computer. Now, from that list locate the ‘Clownfish Voice Changer’ application and then click on the ‘Uninstall’ button.
- Now, once an installer window comes up, next, follow the instructions that come up on the screen and accordingly click on the “Uninstall” button.
- Once the removal process is over, next, visit the official Clownfish website and download the latest version of the voice changer application.
- When the download process is over, next, install the current version of the Clownfish software into the computer. After the installation is complete, then reboot the computer.
- Finally, execute the application and see if this issue is still there or not.
Two: Inspect the Skype Version
If the CPU does not have SSE2 or Streaming SIMD Extensions 2, then it is not compatible with the new version of Skype. If the system has an older generation CPU and you are getting this error, then the best solution is to check the Skype version. Here, get the steps on how to do it.
- First, locate and double-click on the Skype application present within the computer.
- When the application window opens up, next, click on the profile picture that is present on the upper left corner.
- As soon as you click on that picture then, a new dialog box will come up. Inside that dialog box, go to the bottom and choose the “About this version” link.
- Now, another dialog box will come up, in it, there will be all the details of the present version.
- If you have an old computer then downgrade the Skype application to version 7.5 and then try to install Clownfish and see if this problem comes up or not.
Three: Install the Clownfish application into the default Location
Sometimes, if the Clownfish application is not installed into the default location, then you may get this error. The feasible solution to fix the “clownfish voice changer not changing voice” error is to install the application into the default location. In order to do that follow the steps below.
- First, hit the combination of ‘Windows + R’ keys simultaneously. This action will open a new dialog box having the title ‘Run’.
- Inside that dialog box, beside the ‘Open:’ label type in the text “appwiz.cpl” on the blank area and then click on the ‘OK’ button.
- As soon as you click on that button, then a new window having the name ‘Programs and Features’ will come up. Inside that window, you will get all the applications installed within the computer on a list.
- Now, from that list locate the Clownfish application and right-click on it. Then, from the popup menu, choose the ‘Uninstall’ option.
- Go to the first method and then follow the fifth step to download the current Clownfish setup file. Next, double-click on the downloaded setup file, to open the installer window.
- Within that window, when the install location part comes up, then do not alter anything and press ‘Next’ and complete the installation process.
- Lastly, once the installation is over, then reboot the machine and inspect if this issue appears or not.
Four: Installation of Microphone within Clownfish
If you get the Clownfish Voice Changer Not Working issue even after following all the above methods then the chances are that the microphone is not installed correctly. To do that properly, follow the steps below.
- First, locate the Clownfish icon from the ‘System Tray’ which is present at the lower right part of the taskbar.
- After that, right-click on the icon and then from the popup menu choose the ‘Setup’ option.
- As soon as you click on that option, then a new window having the title ‘Setup – Clownfish Voice Changer’ will come up. In this window, there will be multiple modules available.
- Among those modules choose the one that works fine and then click on the ‘Install’ button. Once the installation of microphone modules is complete, next, restart the machine.
- Lastly, once the computer boots up then see if this issue comes up or not.

 Stars-923: Unveiling the Mystical Cosmos
  Buying Guide for Short-Throw 4K Projectors for Gaming
  5 Best Wireless Apple CarPlay Adapters in 2024
  The Essential Role of Animated Explainer Videos in Tech Documentation
  How Do You Apply Agile Testing Principles And Practices Across Different Domains And Contexts?
  What Are The Benefits And Challenges Of Using Mock Objects In TDD?