Resolve Windows Button Not Working Issue Easily
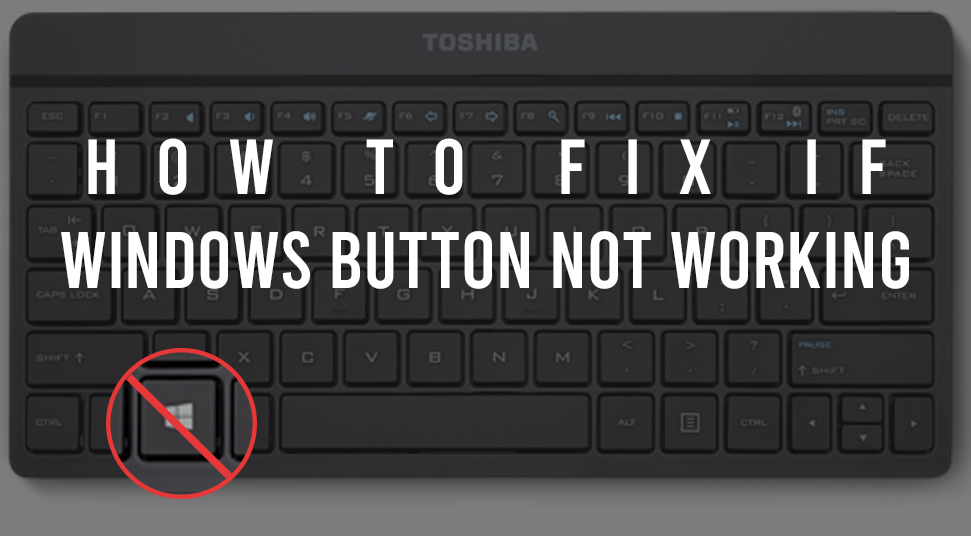
You can access the ‘Start’ menu by clicking the ‘Windows’ button on the taskbar. This menu can provide you with access to all the applications of the Windows OS, thus it is a necessary feature.
Now, if after updating the Windows OS suddenly you get the problem “Windows button not working”, then do not worry. Here you will get relevant answers to resolve that error.
How to rectify the start button not working Windows 10 Issue?
Here, you will get many ways to get rid of this error from the Windows 10 machine as soon as possible.
A: Inspect Windows Files and Repair Them
The corrupted system files can lead to many errors in Windows. Likewise, due to problematic system files, you can get this issue also. Now, the best solution to resolve this error is to fix any corrupt system files with two in-built tools ‘System File Checker’ and ‘Deployment Image Servicing and Management’
The SFC tool scans the computer for corrupt system files and replaces them with a working substitute. The DISM tool is used to scan the image file of the Windows for any problems and repair them. In order to run these two tools follow the steps below.
- First, right-click on the blank area of the taskbar to open the popup options list.
- Next, from that list, locate the ‘Task Manager’ option and click on it. As soon as you do that, then a new dialog box will come up having the title ‘Task Manager’ will come up.
- Inside that dialog box, go to the top menu bar and click on the ‘File’ item. This action will open a drop-down list. From that list, click on the ‘Run new task’ option.
- Now, a new dialog box will appear having the title ‘Create new task’. In this dialog box, type the text “powershell” on the blank space, besides the ‘Open:’ label.
- After that, put a checkmark on the ‘Create this task with administrative privileges.’ option and tap on the ‘OK’ button.
- As soon as you do that, then a new window with a blue background and white text will appear having the title ‘Administrator: Windows Powershell’.
- In that window, write the command “sfc /scannow” and press on the ‘Enter’ key to execute. Once the execution of this command is over, next, you will get a message ‘Windows Resource Protection did not find any integrity violations.’
- Next, type the following command “DISM /Online /Cleanup-Image /RestoreHealth” and tap on the ‘Enter’ key. Wait for this command to execute completely.
- Once the execution of both the commands is over, next, close the ‘Windows PowerShell’ window and restart the computer.
- Finally, reboot the machine and check to see if the Windows button is working or not.
B: Kill and Restart the Windows Explorer process from Task Manager
Sometimes if the Windows image does not load properly, then you can encounter the start button not working Windows 10 error. The easiest way to rectify this problem is to kill the Windows Explorer from the Task Manager. In order to that, you can follow the steps below.
- First, tap on the three keys ‘Ctrl + Shift + Delete’ together. This action will open a new screen with a blue background and five options to choose from.
- Among those five options, choose the one that says ‘Start Task Manager’. As soon as you tap on that option, then a new ‘Task Manager’ dialog box will come up.
- Inside that dialog box, click on the ‘Processes’ tab. Under that tab, you will get a list full of applications that are running currently.
- Next, from that list, locate the ‘Windows Explorer’ and right-click on the same. This will reveal a popup menu. Now, from that menu click on the ‘Restart’ option.
- Once you click on that option, next, the ‘Windows Explorer’ application will be killed and then restart.
- At last, click on the Windows button and see if it launched the ‘Start’ menu or not.
3: Update both audio and video card Drivers
If the audio and video card drivers installed within the computer are not up to date, then there is a chance for you to get this glitch. Now, the effective solution to this issue is to perform an update for both the above-mentioned drivers. Here, you will get the steps on how to do it.
- First, press on both the ‘Windows + R’ keys simultaneously to open the ‘Run’ dialog box.
- Within that dialog box, type in the text “devmgmt.msc” on the empty space beside the label ‘Open:’ and press the ‘Enter’ key.
- At this time a new window will come up, in it, there will be a list of devices and their drivers on a sublist.
- Next, from that list locate the ‘Display adapter’ and click the arrow on the left to reveal the driver on a sublist.
- From that sublist, choose a graphics card driver and right-click on the same.
- As soon as you do that, then a popup menu will appear, in it, tap on the ‘Update driver’ option. This action will open a new dialog box with two distinct links.
- Among those two links choose the first one that says ‘Search automatically for updated driver software’
- Once you click on that link, next, the Windows will automatically search for an update to the chosen driver. If any update is available, then that will be downloaded and installed automatically within the machine.
- Now, from the list, select the ‘Sound, video and game controllers’ device and repeat from fourth till eighth steps to update the first driver.
- In order to update the remaining driver of the ‘Sound, video and game controllers’ device, repeat from the fifth to eight steps.
- When the driver update process is complete, next, close ‘Device Manager’ and restart the computer.
4: Log in to the Windows Account
Sometimes if the login process of the Windows account is an internal problem, then you might face the Windows button not working glitch. Now, the best possible answer to resolve this issue is to log in to the Windows account once again. Here, you will get the process, on how to achieve it. So follow the steps below.
- First, press on the following three keys ’Ctrl + Alt + Delete’ keys together. Now, on the screen that comes next locate the ‘Sign out’ option and click on the same.
- As soon as you tap on that option, then immediately you are logged out of your Windows account and the lock screen comes up.
- Next, type the password in the field and log into your account once again.
- Once the desktop appears, next, go to the Windows button on the taskbar and click on it.
- At last, check whether the ‘Start’ menu comes up or not.
5: Remove any reliable security Application
If you have installed a reliable security application on the Windows 10 machine, then due to some internal alteration of the core system files, the start button may not work. Now, the one and only solution to resolve this issue is to remove the reliable security application form the computer. To do that, follow these steps below.
- First, hit on the combination of the ‘Windows + S’ keys simultaneously to launch the default search area.
- Inside that area, type in the following text “control panel”. After that, from the search output section locate and select the ‘Control Panel’ option.
- Once you do that, next, a new window will appear with the title ‘Control Panel’. Inside that window, there will be plenty of setting categories for the computer, that you can adjust when there is a need.
- Now, out of all the categories choose the one that says ‘Programs’. When you click on that category, next, a new page will appear, in it, select the ‘Programs and Features’ option.
- As soon as you click on that option, then a list full of all the installed applications will come up. From that list, find and select the reliable security software, then right-click on the same.
- When the popup menu comes up, next tap on the ‘Uninstall’ option. This action will reveal an uninstaller window.
- Inside that window, follow the on-screen instructions and then tap on the ‘Uninstall’ button. Wait for the reliable security application to be removed from the computer.
- Once the uninstallation process is complete, next, restart the machine.
- Finally, activate the inbuilt security application i.e Windows Defender and run a full scan and check for any malware or virus within the machine.
6: Make a new user Account
If the user account files have got corrupted somehow, then you can get the Start button not working Windows 10 error. The most effective solution to solve this problem is to create a new user account. This user creation procedure is divided into two submethods, So follow them sequentially.
Local user account creation Process
Here, you will get the steps on how to create a local user account on Windows 10.
- First, press on the ‘Windows + I’ keys together to open a new window with the title ‘Settings’.
- Inside that window, find and click on the ‘Accounts’ category. As soon as you click on that category, then a new page will appear, in it, choose the ‘Family & other users’ option.
- Next, tap on the ‘Add someone else to this PC’ button.
- When a new dialog box appears, next, go to the bottom-left side and click on the ‘I don’t have this person’s sign-in information’ link.
- On the next page choose the ‘Add a user without a Microsoft account’ button.
- Lastly, provide the details like user name, password, etc and click on the ‘Next’ button to create the new user account.
Alter the local user account to an administrator One
After the new local user account creation is complete, follow the steps below to alter it to the administrator one.
- First, go to the right edge of the taskbar and select the ‘Notifications’ icon. As you click on that icon, then a new ‘Notifications’ panel from the right side of the screen will appear.
- Inside that panel, you will get all the notifications along with the icons of some necessary Windows features.
- Go to the lower section of the ‘Notifications’ panel and tap on the ‘All Settings’ option. This action will open the ‘Settings’ window.
- Now, navigate to the previous submethod and follow the second step to select the ‘Family & other users’ option.
- Next, from the page choose the newly created user name and then tap on the ‘Change account type’ link.
- As soon as you do that, then a new dialog box will come up. In that dialog box, under the ‘Account type’ heading, locate and choose the ‘Administrator’ option, then click the ‘OK’ button.
- Lastly, restart the computer and log in to it with the newly created administrator account, then check if the Windows button problem is there or not.
7: Install Cortana once Again
If the installation of Cortana is not properly done, then you can problems with the ‘Start’ menu. The right answer to removing this problem is to reinstall Cortana. In order to do that, follow the steps given below.
- Go to the fifth method and follow the initial step there to open the default search area of Windows.
- Inside that area, enter the text “command prompt” and then from the results section locate and right-click on the ‘Command Prompt’ option.
- As soon as the popup menu comes up, then click on the ‘Run as administrator’ option. This action will launch a new window having the title ‘Command Prompt’.
- Inside that window type the following command – ‘Get-AppXPackage -Name Microsoft.Windows.Cortana | Foreach {Add-AppxPackage -DisableDevelopmentMode -Register “$($_.InstallLocation)\AppXManifest.xml”}. After that press the ‘Enter’ key to run the same.
- Now, wait for the execution of this command to get over. Once the execution is complete, next, that means that Cortana is reinstalled into the machine.
- At last, reboot the computer and then check to see if this issue is resolved or not.

 How to Solve GameStop Access Denied Error?
  Solutions of the Error: Origin Friend Request not Working
  Fixed: Dragon Age Inquisition Opens then Closes
  Guide to Enable On-Screen Keyboard on Windows 10 PC
  How to Perform Android File Transfer to Windows 10 PC?
  Install Snapchat for Windows 10 PC [Installation Guide]