Guide to Enable On-Screen Keyboard on Windows 10 PC

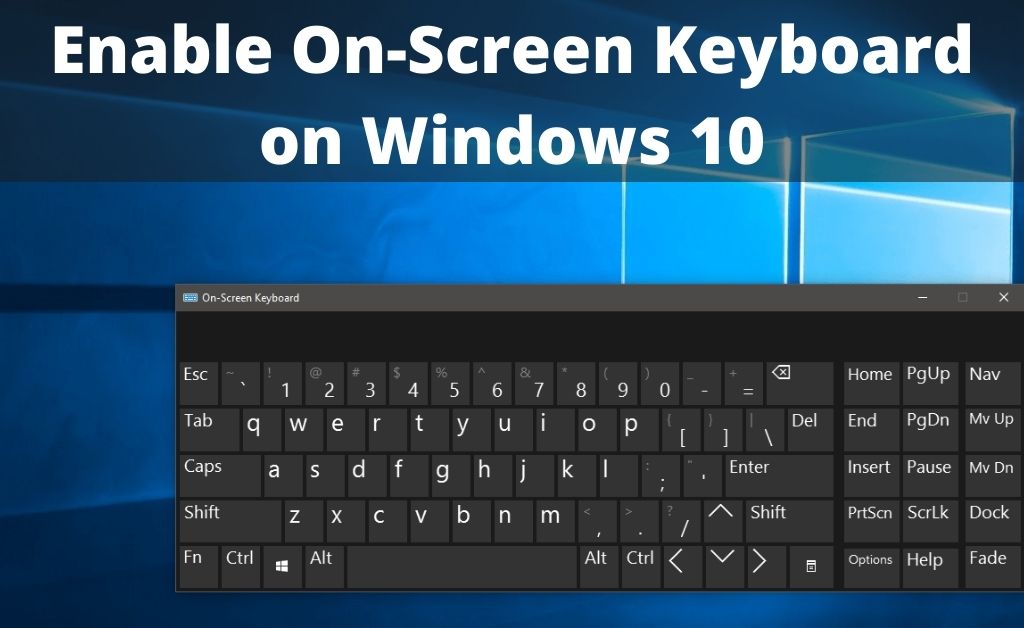
Windows 10 adds a wide range of new features to your PC. It brings in many advanced features to enhance your convenience. And, the on-screen keyboard is one such feature.
Since its introduction, you need not rely solely on your physical keyboard to type on your computer. So that makes it one of the most significant additions to the Windows operating systems. Keep reading to know how the On-Screen Keyboard Windows works and how to use it.
What is the On-Screen Keyboard Windows 10 and How does it Work?
You must note that the On-Screen Keyboard is not the same as the Touch Keyboard. The Touch Keyboard is only available on computers that have touch screen functionality. While the On-screen Keyboard is available on any PC that has Windows 10. In other words, you do not need touchscreen functionality on your PC to use the On-Screen Keyboard.
So, how do you type with the On-Screen Keyboard? In case you are wondering, you need to use the mouse pointer for that. You can also use the direction keys on the physical keyboard to cycle through the keys on the On-Screen Keyboard.
But, you need to bring up this visual keyboard on your screen first. And, there are various ways to do that as we shall see.
How to Enable the On-Screen Keyboard?
Do you want to try out the On-Screen Keyboard Windows 10? Then, there are 6 ways to bring it up on your screen. And, you can follow any of these methods that you prefer for doing so:
Through the Settings
You can easily turn on the On-Screen Keyboard on your PC by going to its Settings menu. Find and open the Ease of Access section given below Time & Language. Go to the Keyboard tab there to open the keyboard settings. You should find the On-Screen Keyboard options given there. And, it is turned off by default on your Windows system.
Toggle on the On-Screen Keyboard Windows 10, if it is toggled off. Then, you can start using this feature for typing on your PC.
Using the Run Program Option
You can also use the Run feature to activate your Windows On-Screen Keyboard. So, go to the Quick Access Menu and click on Run. Then, type and enter ‘osk’ in the field and click on OK. This should enable the On-Screen Keyboard on your PC, if you are using Windows 10. If this does not work, you can also try out other methods to enable the feature.
Through the Search Menu
Open the Start menu search bar on your PC and enter “on screen keyboard”. You might get a suggestion for the feature even before you type its full name. Click on the suggestion to open the On-Screen Keyboard settings and enable it. Also, go through the usage options and customize them as per your preferences.
Through the Ease of Access Center
You can easily enable the On-Screen keyboard by going to the Ease of Access Center. Hold down the Windows key and press U to reach there. Check the options given under “Make your computer easier to use” and select “Start On-Screen Keyboard”. You can then start using this feature on your Windows 10 PC. If it does not work, you must reboot the system to register the changes.
Using Windows PowerShell
You can also enable On-Screen Keyboard Windows 10 through PowerShell. It is a configuration management and task automation program present in all recent Windows systems. Also, it works similar to the Command Prompt on your device. You can find the PowerShell and launch it through the Start menu search bar, like most other programs. Then, type and enter “osk” there to enable the On-Screen Keyboard.
Using the Command Prompt
You can launch the Command Prompt, through the Star menu search bar or the Quick Access Menu. In the latter case, you must press Windows and X simultaneously and click on Command Prompt. Then, enter “osk” to activate the On-Screen Keyboard Windows 10 on your PC.
Options You can Choose in the Windows On-Screen Keyboard
You can set up the On-Screen Keyboard in various ways on your PC. As mentioned before, you can find its options through Settings. You can enable or disable the following On-Screen Keyboard Windows 10 features as per your requirements:
Numeric Keypad
You might need to type numerals on your PC quite often. But, the numeric keypad is not enabled on the On-Screen Keyboard by default. So, you need to enable this feature through the On-Screen Keyboard section in the Settings. You can then use this keyboard to type numerals as well, apart from alphabets and symbols.
Clicking Sound
The clicking sound on your physical keyboard lets you know that you have pressed a key. You can enable this sound for your On-Screen Keyboard Windows 10 as well. And, that might assist you quite a lot in typing with the visual keyboard. So, you might want to enable it through On-Screen Keyboard settings.
Text Prediction
Typing with the On-Screen Keyboard might take longer than doing the same on a physical one. So, using predictions might help you make your typing faster while using this keyboard. You can get predictions on multiple languages apart from English, including French, German, and Spanish. Moreover, you can add a language that is unavailable in the predictions by downloading a language file.
Click or Hover on Keys
You must choose the suitable option to select a key on your On-Screen Keyboard Windows 10. Clicking on them with the pointer is not the only way to press a key. You can also hover over a key for a specific time to select it. So, enable the method that you find more convenient among these two.
Add On-Screen Keyboard to the Taskbar
You can access the On-Screen Keyboard Windows 10 more easily by pinning it to the Taskbar. Go to the All Apps section and expand the Windows Ease of Access option to do that. Then, right-click the On-Screen keyboard feature and opt for pinning it to the taskbar.

 How to Solve GameStop Access Denied Error?
  Solutions of the Error: Origin Friend Request not Working
  Fixed: Dragon Age Inquisition Opens then Closes
  How to Perform Android File Transfer to Windows 10 PC?
  Install Snapchat for Windows 10 PC [Installation Guide]
  Cursor won’t move on your Computer? What to do Now?