Fix the Service Host Local System High CPU Problem

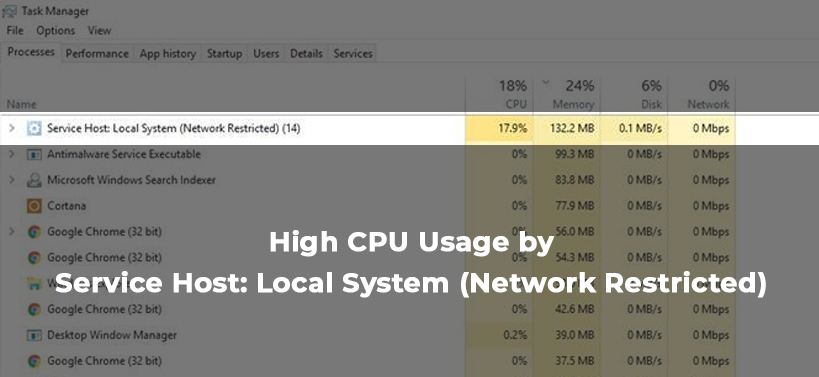
The “service host superfetch” issue can appear on the Windows 10 computer due to some glitch with the said service. This issue when occur can take up 95% of the CPU’s and/or hard disk. Due to the full utilization of the resources, the computer becomes laggy or cannot be used at all.
What is the Service Host Superfetch?
The Service Host Superfetch is the Windows OS, that allows you to manage the memory randomly, so that, the applications can run very efficiently. This service allows any reliable applications and the Windows core components to run more quickly. In order to accomplish this task, Superfetch service keeps some of the frequently used data of a program on the RAM itself so that it can access them as soon as possible.
Why the Service Host Local System Network Restricted Problem occur?
This error can occur due to a lot of different reasons. Some of those causes are as follows.
- If the system files are corrupted, then you might face this problem.
- The SVChost process can high CPU or disk usage
- If the processor scheduling is not set properly, then there is a chance for you to encounter this error.
- When the Windows Update service is not running as it should, then this issue may crop up.
How to Solve the Service Host Local System High CPU Usage Error?
You will get a multitude of methods here, that will allow you to rectify this error easily.
A: Deactivate the Superfetch Service
The Superfetch is the service that takes up a lot of CPU time when it runs. Therefore, the best solution to get rid of this problem is to disable the ‘Superfetch’ service. Here, you will get the steps on how to do so.
- First, tap the ‘Cortana’ logo on the taskbar. This will open a new default section, in it, type the text “services” and then choose the ‘Services’ option from the results part.
- This action will open a new window having the name ‘Services’ will come up. Inside that window, there consists a list full of all the services of the applications installed within the computer.
- From that list, locate and choose the ‘Superfetch’ service then right-click on it. After that, form the popup menu that appears, choose the ‘Stop’ option.
- At last, reboot the computer and see if this error comes up or not.
B: Execute the Windows Update Troubleshooter
If the updates of the Windows OS have got corrupted somehow, then this problem can appear. The easiest solution to resolve this problem is to run the Windows Update troubleshooter. For that to happen, follow the steps below.
- First, press on both the keys “Windows + R” simultaneously, to launch a new dialog box having the name ‘Run’.
- Inside this dialog box, type the text “control panel” and then press the ‘OK” button. As soon as you click on that button, then a new window with the heading ‘Control Panel’ will come up.
- Inside that window, go to the upper right corner and then choose the option of ‘View by:’ field as ‘Large icons’ instead of the ‘Category’.
- Next, from that window locate and choose the ‘Troubleshooting’ category. This action will open a new page with the title ‘Troubleshooting’.
- Inside that page, go to the left pane and choose the ‘View all’ link. Once you click on this link, then another new page will appear, in it, find and choose the ‘Windows Update’ option.
- At this time, a new Windows Update Troubleshooter dialog box will come up, in it, click on the ‘Advanced’ button and then click the ‘Run as administrator’ link.
- Now, put the checkmark on the ‘Apply repairs automatically’ and then click on the ‘Next’ button.
- Finally, follow the instructions that appear on the window and allow the troubleshooter to fix the Windows Updates automatically.
C: Rectify the leak in memory from the non-paged pool of RAM
If there is a leak in the RAM from its non-paged pool area, then you can get the “service host local system network restricted” issue. The only way to resolve this issue is to fix this problem using the Registry Editor.
- First, hit on both the ‘Windows + S’ keys simultaneously, to reveal the default the search area.
- In this area, type the text “registry editor”. Then from the result section of this search, choose the ‘Registry Editor’ option.
- As soon as you do that, then a new ‘Registry Editor’ window will come up.
- Inside this window, go to the left panel and navigate to the ‘ControlSet001” folder by double-clicking on the following directories – “Computer -> HKEY_LOCAL_MACHINE -> SYSTEM -> ControlSet001 -> Services -> Ndu”.
- Go to the right pane of the window and then double-click on the ‘Start’ key to change it.
- Within the ‘Edit DWORD Value’ dialog box, alter the number within the ‘Value data:’ to 4. This action will deactivate the key and thereby stop the memory leak inside the non-paged pool.
- At last, tap on the ‘OK’ button, then quit from the Registry Editor and reboot the computer.
D: Execute the SFC and the DISM Scan
If the computer contains corrupt system files, then you may face this problem. Now, the most feasible way to rectify this problem is to run both inbuilt tools SFC and DISM to fix any corrupt system files. For that to happen, follow the steps below.
- First, right-click on the ‘Windows’ logo to open the ‘Options menu’. In this menu, locate and choose the ‘Command Prompt (Admin)’ option. If there is no option for Command Prompt, choose the ‘PowerShell (Admin)’.
- When the Command Prompt window appears, next, type in the following command “sfc /scannow”. Then choose the ‘Enter’ key to execute the command.
- Wait for the above command to execute completely. After that, input the next command “DISM /Online /Cleanup-Image /RestoreHealth” and then press the ‘Enter’ key.
- Once the execution of both the commands is over, next, close the ‘Command Prompt’ window and restart the computer and see if this issue is there or not.
E: Perform Clean Boot Process
Sometimes during the startup process, some other reliable applications can give you service host local system high disk error. The easiest solution to resolve this issue is to perform a clean boot process. To do that, follow the steps below.
- First, press the ‘Windows + R’ keys together. Next, enter the text “msconfig” and then tap on the ‘OK’ button.
- When you click on that button, next, a new ‘System Configuration’ dialog box will appear. Inside that dialog box, click on the ‘Services’ tab. Under this tab, below the list choose the ‘Hide all Microsoft services’
- Next, click on the ‘Disable all’ button. Now, go to the ‘Startup’ tab and then click on the ‘Open Task Manager’ link.
- This action will open the ‘Task Manager’ window with the ‘Startup’ tab already chosen.
- Within that tab, choose the first application and right-click on it. After that, from the popup menu, choose the ‘Disable’ button.
- Repeat the previous step to disable all the remaining applications present inside the ‘Startup’ tab and then reboot the computer. Inspect whether this error goes away or not.
- If this error does not appear anymore, then enable the applications within the Startup tab and see which one triggers this error.
- At last, once you have identified the problematic service, next keep it disabled or reinstall once again.
F: Kill the SVChost
The SVChost service takes up a lot of resources of the computer like CPU and disk, and due to it, you can face this glitch also. So the correct answer to resolve this problem is to kill the SVChost service.
- First, press the combination of ‘Ctrl + Shift + Del’ keys and open the ‘Task Manager’ window.
- Next, click the ‘More details’ button to expand the ‘Task Manager’ window. This action will show the running processes on a list.
- From that list, look for the ‘Service Host: Local System’ process and right-click on it. Next, from the popup menu that comes up, choose the ‘End Task’ option.
- If you see the confirmation dialog box, then put a checkmark on the ‘Abandon unsaved data and shut down’ and then click on the ‘Shut down’ down.
- Finally, supervise the usage of CPU and see if this problem is there or not.

 How to Solve GameStop Access Denied Error?
  Solutions of the Error: Origin Friend Request not Working
  Fixed: Dragon Age Inquisition Opens then Closes
  Guide to Enable On-Screen Keyboard on Windows 10 PC
  How to Perform Android File Transfer to Windows 10 PC?
  Install Snapchat for Windows 10 PC [Installation Guide]